Item Banks
Learn how to create items and manage your item banks.
![]()
Access to certain features is restricted based on role type in an effort to reduce item exposure and promote process integrity. Please see the member role description page for information on permissions.
Creating test items in Webassessor is straightforward and allows for organized management of your questions. Follow the steps below to get started:
Step 1: Create an Item Bank Folder
Before you can create test items, you need to set up at least one item bank folder. Item bank folders help you organize your questions efficiently.
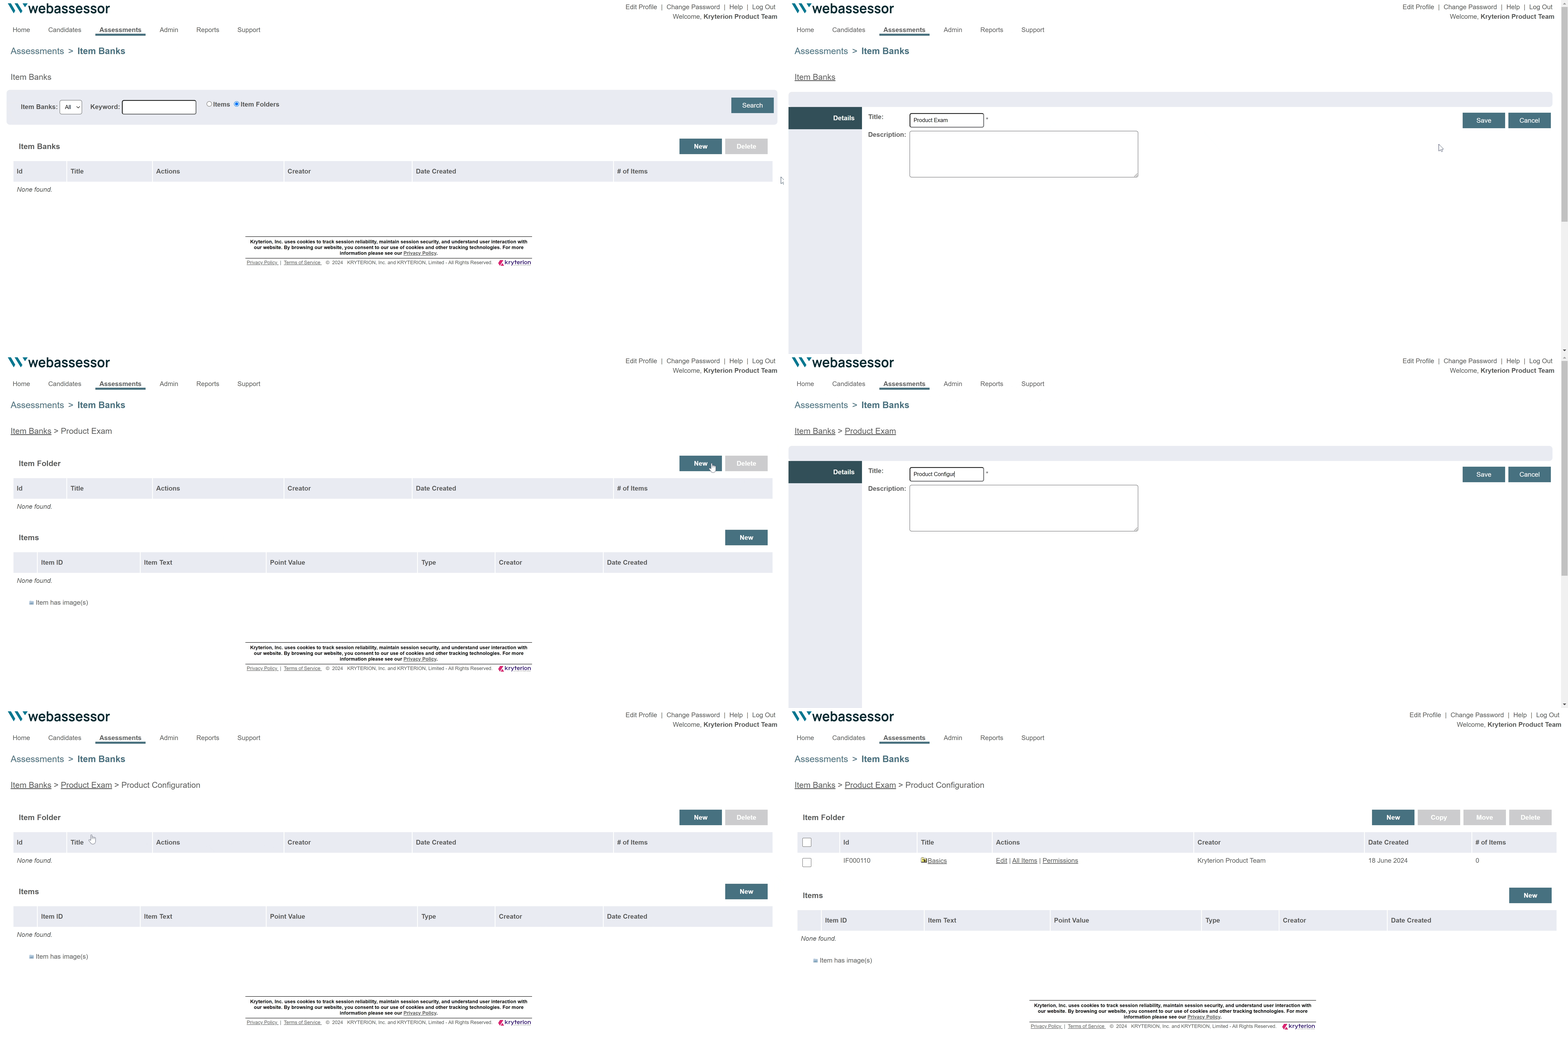
Navigate to the Item Bank Section:
Go to the main menu, click on “Assessments” and then “Item Banks”
Create a New Item Bank Folder:
Click the "New" button.
Enter a title for your folder. For example, if you're building an exam on how to use/configure your product, you might create folders such as "Product Configuration," "User Interface," and "Advanced Features."
You can add subfolders within these folders for further organization, like "Basics," "Advanced," etc.

Step 2: Start Creating Items
Once your item bank folder is set up, you can begin creating test items.
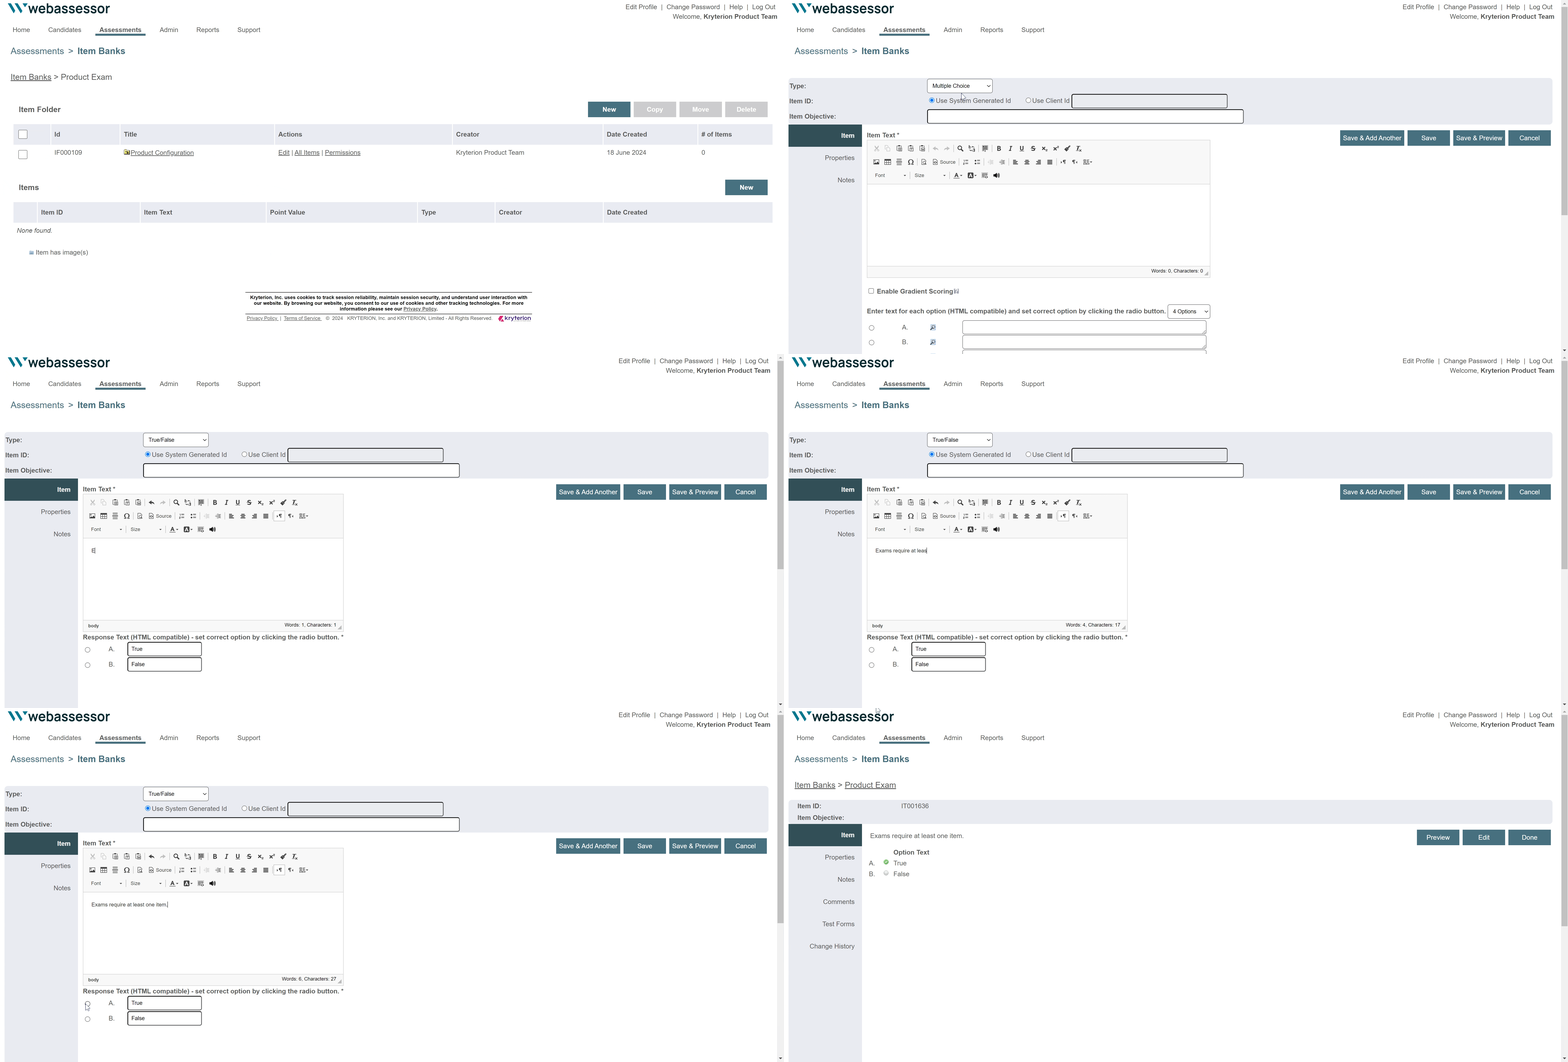
Select the Desired Folder:
Navigate to the item bank folder where you want to add the new item.
Open the Item Editor:
Click the "New" button under the items section. This will open the item editor.
Choose the Item Type:
In the item editor, select the type of item you want to create. Options include:
Multiple Choice
Multiple Selection
True/False
Matching
Fill in the Blank
Short Answer/Essay
Category Matching
Draft the Item Text:
Enter the question or prompt for your test item in the provided text box.
Enter Answers and Distractors:
For multiple-choice and multiple-select items, enter the correct answer(s) and distractors (incorrect options).
For true/false items, simply indicate the correct answer.
For other types, provide the necessary information as prompted by the item editor.
Save Your Item:
Once you've entered all the required information, click the "Save" button to add the item to your selected folder.

Step 3: Review and Manage Your Items
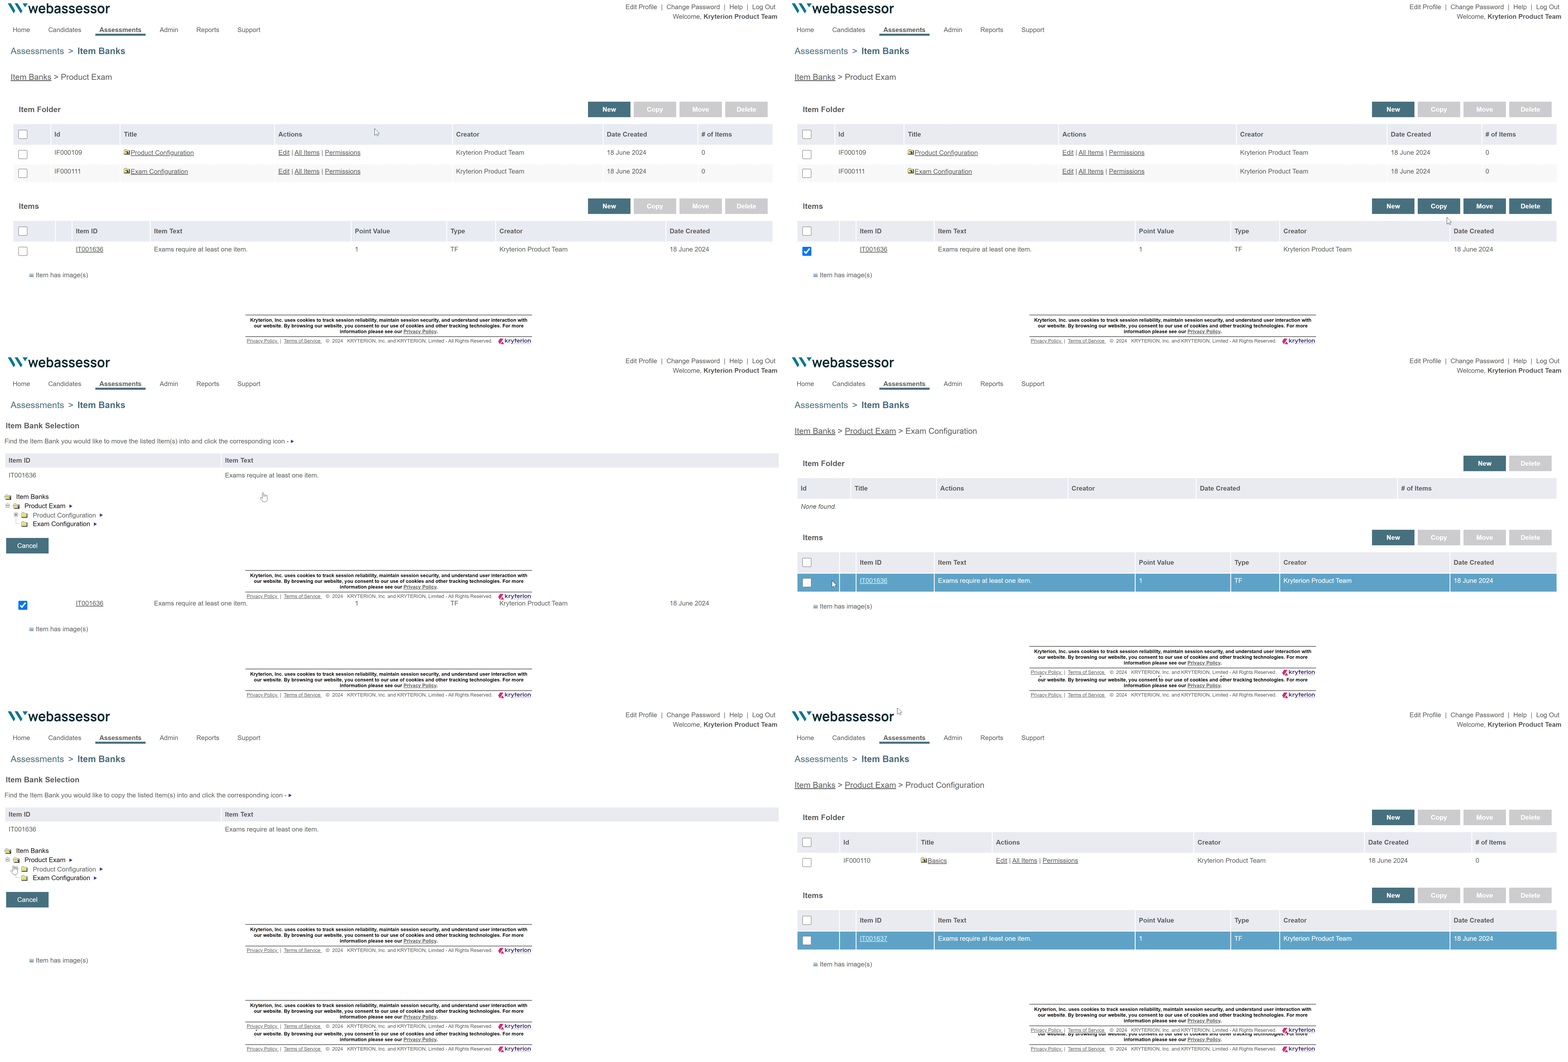
Review Items:
Navigate through your item bank folders to review the items you've created. You can edit, delete, or copy items as needed.
Organize Items:
Move items between folders if you need to reorganize them. This helps keep your item bank clean and easy to navigate.

