Readiness Exam
What is a Readiness Exam?
The Readiness Exam is a short, simulated online proctored exam designed to help candidates confirm that their equipment, internet connection, and environment meet technical requirements before taking their actual certification exam.
It provides a practice run of the entire online proctoring process (from system check through exam launch) helping reduce stress, prevent technical issues, and ensure a smooth test-day experience.
Why Offer a Readiness Exam?
Offering a readiness exam helps:
Familiarize candidates with the online proctoring experience and exam interface.
Identify potential technical issues (e.g., webcam, microphone, or internet).
Ensure that candidates are comfortable with security requirements before test day.
Allow candidates to get a feel for the actual exam experience, including how to navigate between questions, use on-screen tools, and view different question types they may encounter during their real exam.
How It Works
Candidates will see the readiness exam link on their My Assessments page.
When launched, it behaves like a normal online-proctored exam (camera check, ID check, etc.) but is fully simulated — no live proctor is present, and no scores are generated.
The exam uses your organization’s selected questions and settings.
Steps to Create a Readiness Exam
Important: The Readiness Exam functionality must first be enabled by your Kryterion Customer Success Manager (CSM).
Once it’s turned on, you’ll see options in your admin interface to mark exams as Readiness Exams and select which one should be Active.
Follow these steps to create and publish a readiness exam in Webassessor:
Step 1: Create a Folder
Create a new folder in your Item Bank to store all Readiness Exam questions.
Step 2: Add Questions
Create the questions you want to include in your Readiness Exam and save them in the folder you just created.
Step 3: Build a Test Form
Go to Test Forms and create a new form.
Add a single topic and include the questions from your Readiness Exam folder.
Scoring settings are not required, as readiness exams are not scored.
Step 4: Publish the Test Form
Once complete, publish the test form so it can be linked to your exam.
Step 5: Create a New Exam
Navigate to Exams and click New to create a new exam record.
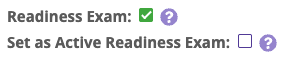
Step 6: Designate as a Readiness Exam
Check the box labeled “Readiness Exam” to mark this exam as a readiness exam.
Step 7: Configure Exam Settings
Add the desired configuration:
Exam instructions
Agreement text
Time limit
Any other exam-specific settings
Step 8: Assign the Test Form
Select and assign the published test form created in Steps 3 and 4.
Step 9: Make the Exam Active
To display the exam to candidates:
Check the box labeled “Set as Active Readiness Exam” to make this exam the active readiness exam.

Note: Only one readiness exam can be active at a time, but you can create multiple for future use.
Step 10: Save
Click Save.
When saving, you’ll see a pop-up message:
“You are designating this exam as a readiness exam. It will appear on candidates’ My Assessments page as a step to complete prior to taking an exam. If you have multiple readiness exams created, you can select which one is active in the region settings.”
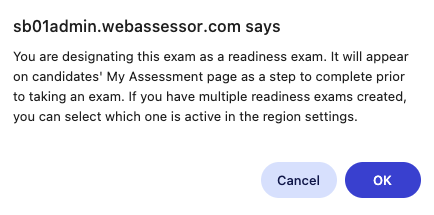
Click OK on the pop-up to proceed with saving.
Additional Notes
Readiness exams are not shown in the standard exam catalog. To locate them, check the “Show Inactive Exams” box when searching in the Exam list.
Only one readiness exam can be active per region at a time.